
Installing Visual Studio Express 2012 for Web
You can install Microsoft Visual Studio Express 2012 for Web or another "Express" version using the Microsoft Web Platform Installer. The following instructions guide you through the steps required to install Visual studio Express 2012 for Web using Microsoft Web Platform Installer.
- Go to [https://go.microsoft.com/?linkid=9810169](https://go.microsoft.com/?linkid=9810169). Alternatively, if you already have installed Web Platform Installer, you can open it and search for the product "Visual Studio Express 2012 for Web with Azure SDK".
- Click on Install Now. If you do not have Web Platform Installer you will be redirected to download and install it first.
- Once Web Platform Installer is open, click Install to start the setup.
 Install Visual Studio Express
 - Read all the products' licenses and terms and click I Accept to continue.
 Accepting the license terms
 - Wait until the downloading and installation process completes.
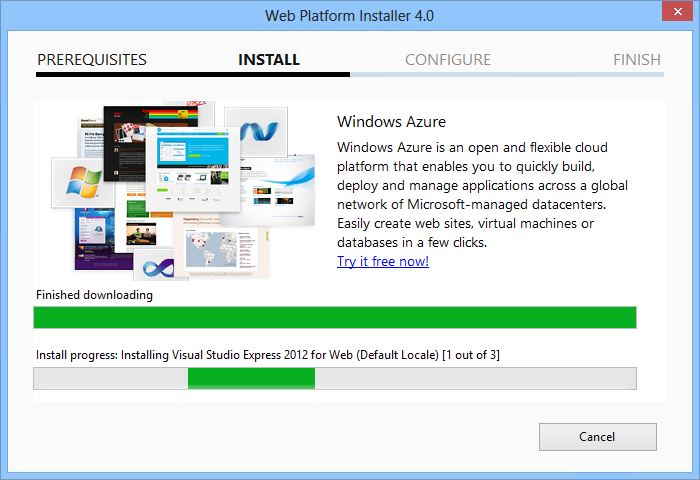 Installation progress
 - When the installation completes, click Finish.
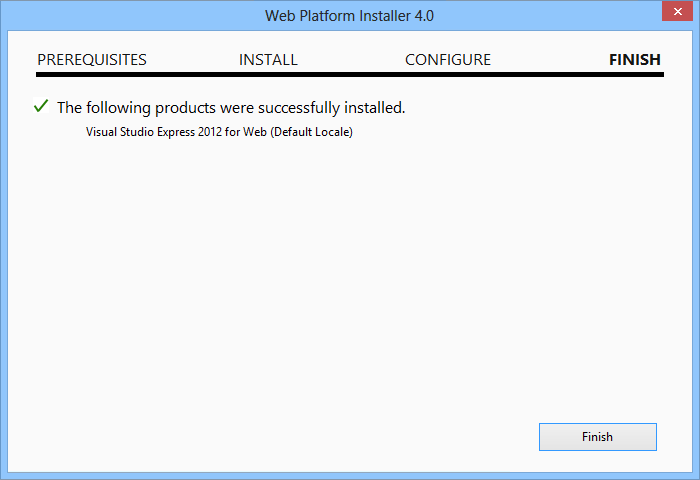 Installation completed
 - Click Exit to close Web Platform Installer.
- To open Visual Studio Express for Web, go to the Start screen and start writing "VS Express", then click on the VS Express for Web tile.
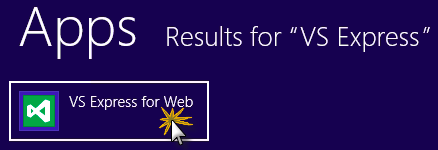 VS Express for Web tile
Appendix C: Publishing an ASP.NET MVC 4 Application using Web Deploy
This appendix will show you how to create a new web site from the Azure Portal and publish the application you obtained by following the lab, taking advantage of the Web Deploy publishing feature provided by Azure.
Task 1 - Creating a New Web Site from the Azure Portal
- Go to the Azure Management Portal and sign in using the Microsoft credentials associated with your subscription.NoteWith Azure you can host 10 ASP.NET Web Sites for free and then scale as your traffic grows. You can sign up here.
 Log on to Portal
 - Click New on the command bar.
 Creating a new Web Site
 - Click Compute | Web Site. Then select Quick Create option. Provide an available URL for the new web site and click Create Web Site.NoteAzure is the host for a web application running in the cloud that you can control and manage. The Quick Create option allows you to deploy a completed web application to the Azure from outside the portal. It does not include steps for setting up a database.
 Creating a new Web Site using Quick Create
 - Wait until the new Web Site is created.
- Once the Web Site is created click the link under the URL column. Check that the new Web Site is working.
 Browsing to the new web site
 Web site running
 - Go back to the portal and click the name of the web site under the Name column to display the management pages.
 Opening the Web Site management pages
 - In the Dashboard page, under the quick glance section, click the Download publish profile link.NoteThe publish profile contains all of the information required to publish a web application to a Azure for each enabled publication method. The publish profile contains the URLs, user credentials and database strings required to connect to and authenticate against each of the endpoints for which a publication method is enabled. Microsoft WebMatrix 2, Microsoft Visual Studio Express for Web and Microsoft Visual Studio 2012 support reading publish profiles to automate configuration of these programs for publishing web applications to Azure.
 Downloading the Web Site publish profile
 - Download the publish profile file to a known location. Further in this exercise you will see how to use this file to publish a web application to Azure from Visual Studio.
 Saving the publish profile file
Task 2 - Configuring the Database Server
If your application makes use of SQL Server databases you will need to create a SQL Database server. If you want to deploy a simple application that does not use SQL Server you might skip this task.
- You will need a SQL Database server for storing the application database. You can view the SQL Database servers from your subscription in the Azure Management portal at Sql Databases | Servers | Server's Dashboard. If you do not have a server created, you can create one using the Add button on the command bar. Take note of the server name and URL, administrator login name and password, as you will use them in the next tasks. Do not create the database yet, as it will be created in a later stage.
 SQL Database Server Dashboard
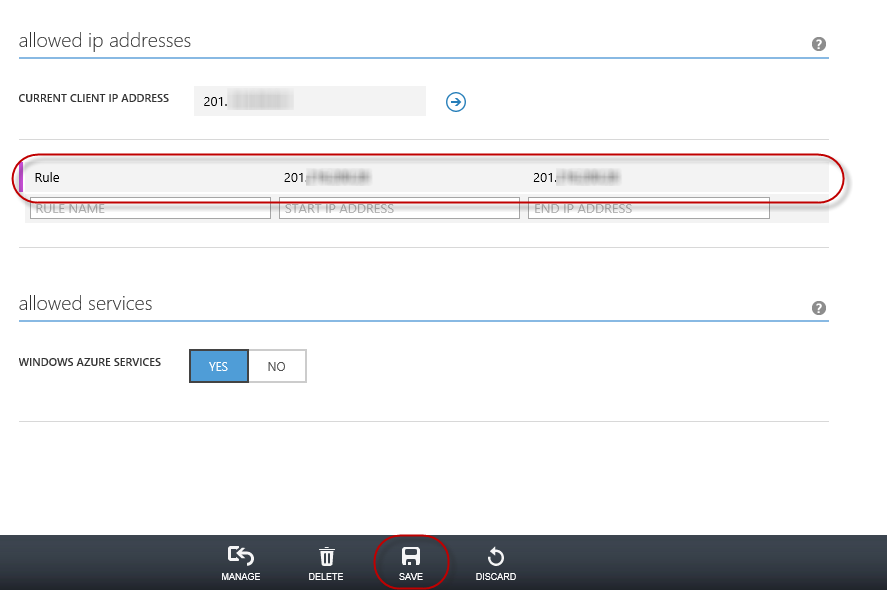
 - In the next task you will test the database connection from Visual Studio, for that reason you need to include your local IP address in the server's list of Allowed IP Addresses. To do that, click Configure, select the IP address from Current Client IP Address and paste it on the Start IP Address and End IP Address text boxes and click the
 button.
 Adding Client IP Address
 - Once the Client IP Address is added to the allowed IP addresses list, click on Save to confirm the changes.
 Confirm Changes
Task 3 - Publishing an ASP.NET MVC 4 Application using Web Deploy
- Go back to the ASP.NET MVC 4 solution. In the Solution Explorer, right-click the web site project and select Publish.
 Publishing the web site
 - Import the publish profile you saved in the first task.
 Importing publish profile
 - Click Validate Connection. Once Validation is complete click Next.NoteValidation is complete once you see a green checkmark appear next to the Validate Connection button.
 Validating connection
 - In the Settings page, under the Databases section, click the button next to your database connection's textbox (i.e. DefaultConnection).
 Web deploy configuration
 - Configure the database connection as follows:
- In the Server name type your SQL Database server URL using the tcp: prefix.
- In User name type your server administrator login name.
- In Password type your server administrator login password.
- Type a new database name, for example: MVC4SampleDB.
 Configuring destination connection string
- Then click OK. When prompted to create the database click Yes.
 Creating the database
 - The connection string you will use to connect to SQL Database in Windows Azure is shown within Default Connection textbox. Then click Next.
 Connection string pointing to SQL Database
 - In the Preview page, click Publish.
 Publishing the web application
 - Once the publishing process finishes, your default browser will open the published web site.

1 Comments
thank you
ReplyDelete